Your iPhone's Notes app serves as a versatile tool for everything from quick lists to private reflections. Ensuring these notes remain private is paramount in today's digital landscape. This guide outlines essential steps to protect your sensitive information within the Notes app.
Understanding Note Storage
Notes can be stored either locally on your device or synced with your iCloud account. Locally stored notes (listed under "On My iPhone") are only accessible with physical access to your unlocked phone. iCloud-synced notes, however, can be accessed from any of your Apple devices, making iCloud security crucial.
Preparation
- Update iOS: Ensure your iPhone runs the latest iOS version for optimal security. Navigate to Settings > General > Software Update and install any available updates.
- Enable iCloud for Notes: Sync your notes with iCloud for accessibility across your devices. Go to Settings > [Your Name] > iCloud and toggle on "Notes". For local storage, ensure notes are stored on your device and not synced with third-party services like Gmail, as this limits security features.
Three Pillars of Note Protection
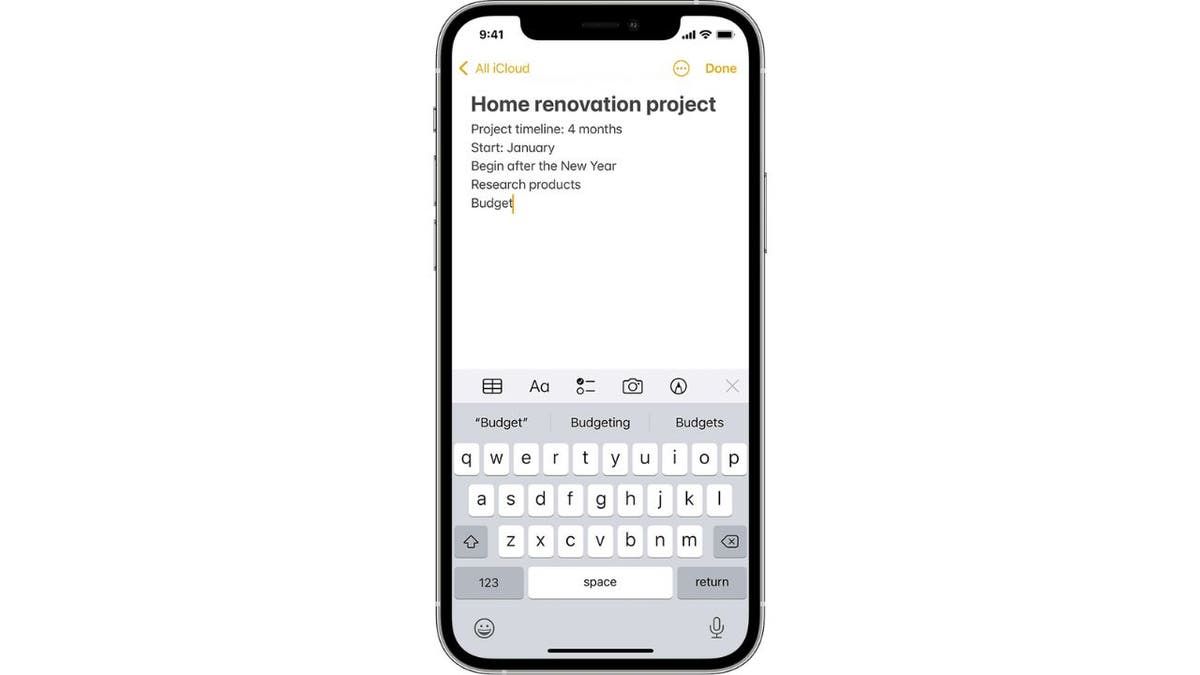
- Locking Individual Notes: This feature adds a password layer to specific notes. See detailed instructions below.
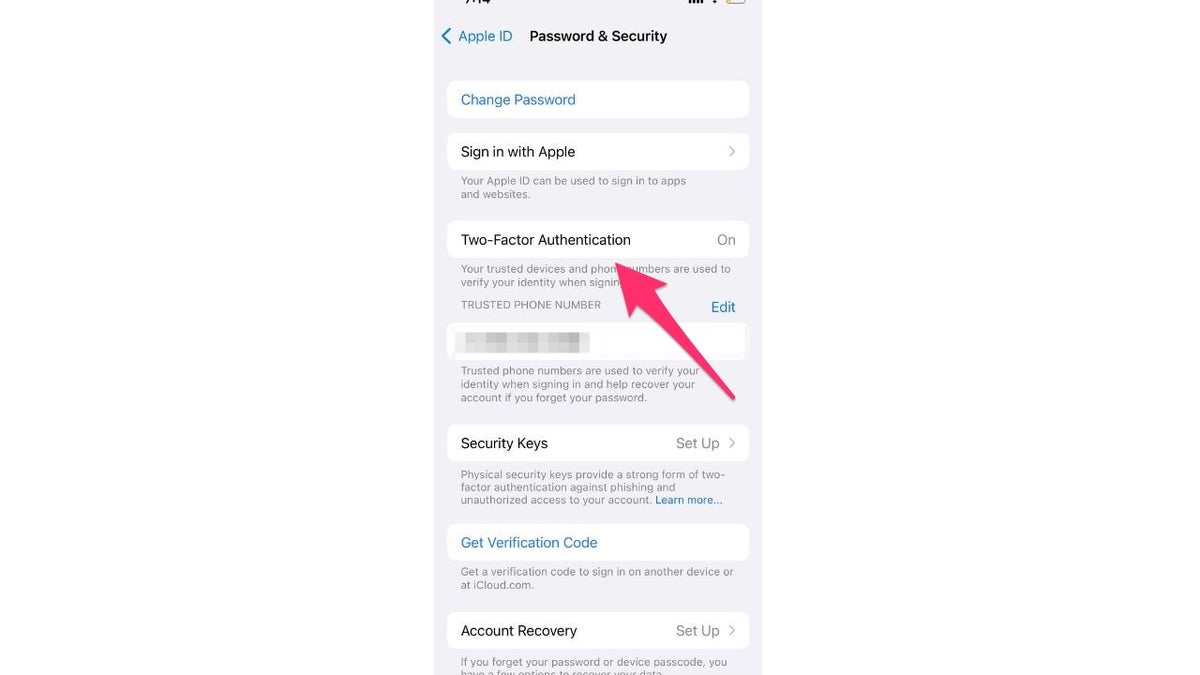
- Two-Factor Authentication (2FA): This adds a second verification step for iCloud access, even if someone knows your password.
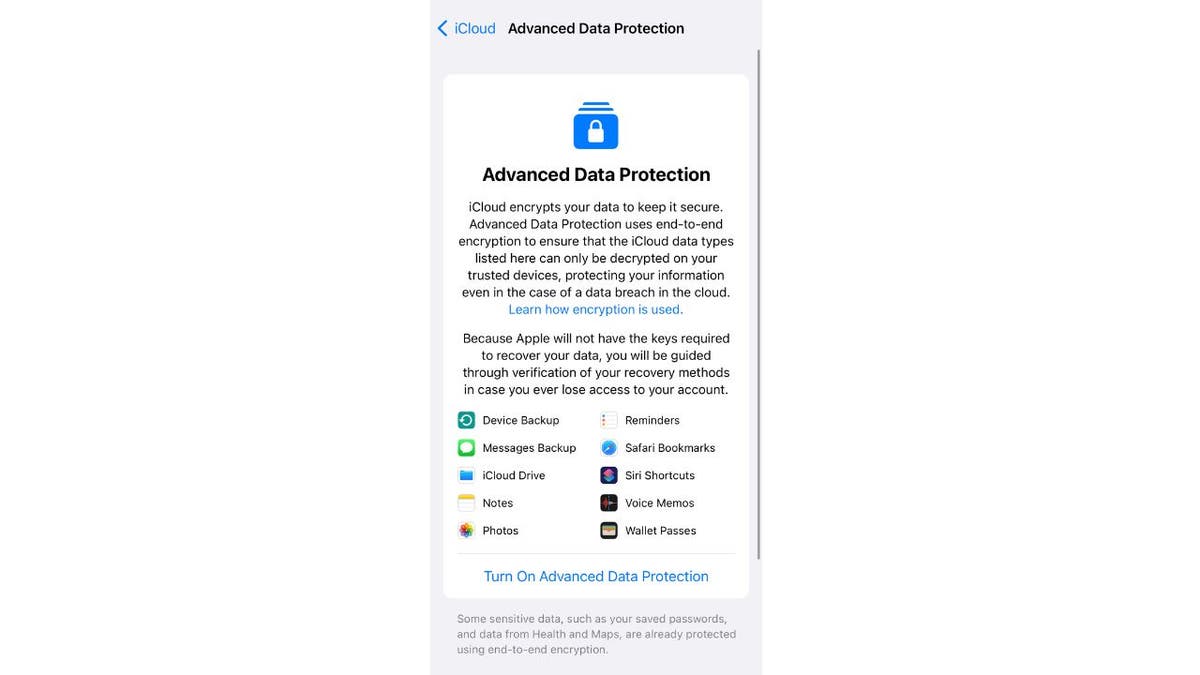
- Advanced Data Protection: This encrypts your iCloud data, including notes, making it indecipherable to unauthorized access.

Locking individual notes within the app adds an extra layer of security. (Apple)
Locking Your Notes: A Step-by-Step Guide
Setting a Notes Password
- Go to Settings > Notes > Password.
- Select the relevant account if you have multiple accounts.
- Choose either "Use Device Passcode" or "Use Custom Password". Create a hint if setting a custom password.
- Enable Face ID or Touch ID for convenient access.
Activating iCloud Keychain
iCloud Keychain enhances security by encrypting and securely storing your notes in iCloud. Enable it by going to Settings > [Your Name] > iCloud > Passwords and Keychain. Ensure it's toggled on.
Locking and Unlocking Notes
To lock: Open the Notes app, select a note, tap the options menu (three dots), and select "Lock". Enter your password or use biometric authentication.
To unlock: Tap the locked note, tap "View Note", and authenticate.
To remove a lock: Unlock the note, tap the options menu, and select "Remove".

Two-Factor Authentication provides a crucial extra layer of security for your iCloud account. (CyberGuy.com)
Enabling Two-Factor Authentication
- Go to Settings > [Your Name] > Password & Security.
- Toggle on "Two-Factor Authentication".
- Follow the on-screen instructions.
Enabling Advanced Data Protection
- Go to Settings > [Your Name] > iCloud > Advanced Data Protection.
- Tap "Turn On Advanced Data Protection".
- Follow the prompts to set up a recovery contact or recovery key. This is essential for regaining access if you lose your device or forget your password, as Apple won't have the decryption keys.

Advanced Data Protection utilizes end-to-end encryption for enhanced security. (CyberGuy.com)
Key Takeaways
Protecting your iPhone notes is essential for digital security. By implementing these measures – locking individual notes, utilizing two-factor authentication, and enabling advanced data protection – you can significantly enhance the confidentiality of your personal information.
Comments(0)
Top Comments